It has been difficult to find time for EVE over the last few weekends. We had two big family birthday party’s including one interstate, family staying with us, and the interruptions to the normal schedule due to school holidays.
It has only been today that I have managed to finish up the Amarr “Right to Rule” Epic Arc chain of missions.
https://wiki.eveonline.com/en/wiki/Right_to_Rule
There was not much about the process which was Epic. The back story flip flopped a bit, the characters were not fleshed out enough, and they didn’t jump well from one suspect to another. The missions themselves were somewhat uninspiring. I think the Cosmos sites, stories and missions I’ve done are better. In fact, the Arc could have done with being a hybrid COSMOS type chain.
There were a couple of missions that really made me stop and consider my fitting. Some had notable neuting, so managing ranges (difficult when using sentries) and fitting the Cap Booster made a difference. I also had to carefully consider how to handle the final stage of the final mission – and ended up using a Microwarp drive to control distance and draw the main NPC Battleship away from the spawn point.
Overall it wasn’t a negative experience – I found it interesting enough and will probably re-run it in the future when the timer is up. I also liked how it didn’t involve quite as much travel as the Servant Sisters of EVE Epic Arc did.
All told I think I made around 300M ISK – more than half of which was from the final reward of an Imperial Navy Imperial Navy Modified ‘Noble’ Implant.
Somewhat annoyingly I did not get any standing updates for completing the chain. Doing some reading it appears to be a common issue, so I submitted a support ticket. I’m not expecting a response until after the weekend.
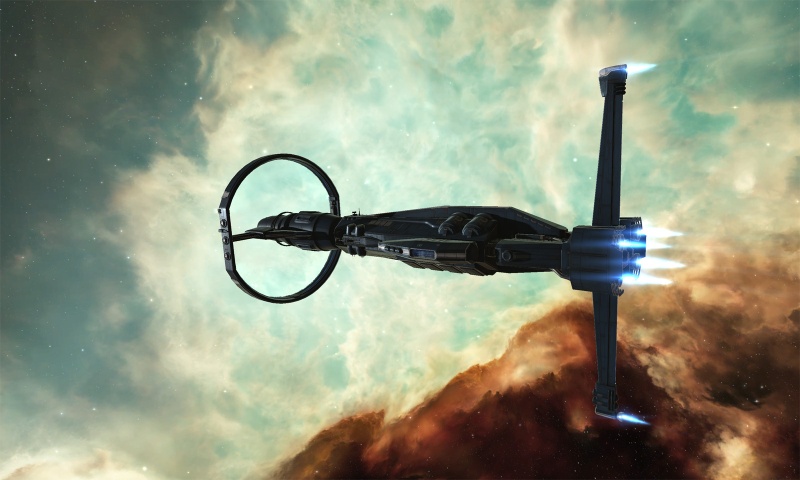
Of greater interest to me was how the Nestor went. I got through the whole chain with it– aside one courier mission that required a hauler, and another mission into Low Sec that only required the use of a shuttle. While I never got below 65% armor, you could lose the Nestor easily enough in a couple of the missions. There were some Veteran Battleships in the “Ascending the Nobles” which did more than 1,000dps combined, which the 750dps tank was not keeping up with. As long as you prioritised those ships there was plenty of armor buffer to cover you until a couple were taken out. There were also a couple missions with very nasty wave trigger sequences – that would easily have seen the ship lost if you messed them up. Having said that, most ships would probably be overwhelmed in the same circumstances.
The Nestor was a somewhat busy hull to fly. I needed to watch the Capacitor levels, particularly in the missions with neuting or where you had to repair drones or use a Microwarp drive. Having said that, I think I only used around 8 Cap Boost Charges across the whole Arc. There was a lot of tracking disruption so I had to regularly swap crystals, and you were forever pulling drones in and out or catching those taking damage so you could repair them. I also tractor beamed and looted wrecks that happened to be within 24km of me, which would not have helped with the feeling of being busy.
It was however a delightful ship to fly around. The main Battleship Hull I’ve flown in recent times has been the Rattlesnake. Mine has an align time of 11.9 seconds and a Warp speed of 2au. The Nestor looks much better on paper – with a 6.6 second align and 2.5au warp speed. In practice it felt even better than the stats suggest – feeling really nimble.
The remote repair range bonus often allowed me to leave drones out when they came under fire, letting them tank the damage and leave the DPS out on the field for longer.
The Dual Heavy Beam Lasers were more effective than expected. While on paper they only did 195dps to 39km and 113dps to 142km, that seemed to make a noticeable difference. They seemed to hit everything out past 30km, and were particularly effective with clearing the battlecruisers and sentries. Being able to fit Aurora or Radio Crystals really went a long way to still be able to hit something even when under heavy turret disruption.
I generally stuck with the T2 variations of the Curator Sentries, Acolytes lights or Infiltrators medium drones. They seemed to be able to clear everything in reasonable time frames. The default Drone control range of 57,000m was ok for almost all the missions – although I would sometimes have to agro using the Beams and wait for some spawn groups to get into range. I used a T2 Drone Link Augmentor in a couple of the missions towards the end.
I think however the biggest testimony to the ship is that I plan on keeping it in my hanger from now on.
I said I would use it across all the Epic Arc missions, but I think I might try a Marauder on the next one. I’ve never flown one of those yet.


The last two fits I used:
[Nestor, Epic Arc Mission – AB]
Damage Control II
Corelum C-Type Energized Adaptive Nano Membrane
Corelum C-Type Energized Adaptive Nano Membrane
Centus X-Type Large Armor Repairer
Drone Damage Amplifier II
Drone Damage Amplifier II
Gist X-Type 100MN Afterburner
Heavy Capacitor Booster II, Navy Cap Booster 800
Sensor Booster II, Scan Resolution Script
Cap Recharger II
Cap Recharger II
Cap Recharger II
Dual Heavy Beam Laser II, Imperial Navy Multifrequency L
Dual Heavy Beam Laser II, Imperial Navy Multifrequency L
Dual Heavy Beam Laser II, Imperial Navy Multifrequency L
Dual Heavy Beam Laser II, Imperial Navy Multifrequency L
Dual Heavy Beam Laser II, Imperial Navy Multifrequency L
Drone Link Augmentor II
Large Remote Armor Repairer II
Large Auxiliary Nano Pump I
Large Auxiliary Nano Pump II
Large Capacitor Control Circuit I
Curator II x5
Acolyte II x5
Infiltrator II x5
—
[Nestor, Epic Arc Mission – MWD]
Damage Control II
Corelum C-Type Energized Adaptive Nano Membrane
Corelum C-Type Energized Adaptive Nano Membrane
Centus X-Type Large Armor Repairer
Drone Damage Amplifier II
Drone Damage Amplifier II
500MN Cold-Gas Enduring Microwarpdrive
Heavy Capacitor Booster II, Navy Cap Booster 800
Sensor Booster II, Scan Resolution Script
Cap Recharger II
Cap Recharger II
Cap Recharger II
Dual Heavy Beam Laser II, Imperial Navy Multifrequency L
Dual Heavy Beam Laser II, Imperial Navy Multifrequency L
Dual Heavy Beam Laser II, Imperial Navy Multifrequency L
Dual Heavy Beam Laser II, Imperial Navy Multifrequency L
Dual Heavy Beam Laser II, Imperial Navy Multifrequency L
Drone Link Augmentor II
Small Tractor Beam II
Large Auxiliary Nano Pump I
Large Auxiliary Nano Pump II
Large Capacitor Control Circuit I
Curator II x5
Acolyte II x5
Infiltrator II x5
—
They had a 746dps tank and did 729dps. With AB it made 474m/s, and 1,271m/s with MWD.